PRUSASLICER CHANGELOG

Version 2.8.1

19. 9. 2024
  • Aufgrund des Feedbacks, das wir nach der Veröffentlichung von 2.8.0 erhalten haben, wurde die Menüleiste wieder eingeführt und das Menü wird nicht mehr unter einer Schaltfläche versteckt. Vielen Dank an alle für das Feedback, es war sehr hilfreich und wird bei möglichen Entscheidungen im Zusammenhang mit der Benutzeroberfläche in Zukunft berücksichtigt werden.
  • Wenn Sie sich mit dem PrusaAccount über die Autorisierung durch Dritte (Google, Apple, Facebook) anmelden, wird ein externes Browserfenster geöffnet, sodass der Benutzer seine Zugangsdaten nicht in von PrusaSlicer erstellten Fenstern eingeben muss.
  • Die integrierte Web-Engine merkt sich den Benutzer nach dem Abmelden nicht mehr.
  • Es gibt zwei neue Parameter: Filament->Erweitert->Abrasives Material und Drucker->Extruder->High-Flow-Düse. Beide Flags werden verwendet, um zu überprüfen, ob ein geslicter G-Code mit dem jeweiligen Drucker kompatibel ist (abrasives Material erfordert eine gehärtete Düse) und um sicherzustellen, dass die Funktion „Als aktuell festlegen“ in PrusaSlicer integriertem Prusa Connect das geeignete Profil für die jeweilige Konfiguration auswählt.
    Beachten Sie, dass diese Funktion seit der MINI/MK4/XL-Firmware-Version 6.2.0-alpha1 unterstützt wird und dass die Implementierung in Prusa Connect noch nicht vollständig abgeschlossen ist, was bedeutet, dass der Dialog, in dem der Drucker ausgewählt wird, diese Informationen nicht verwendet – er wird später funktionieren, ohne dass eine neue Slicer-Version heruntergeladen werden muss.
  • Die automatische Ausrichtung von Brücken wurde verbessert. Probleme mit nicht verankerten Brücken, die durch eine ungünstige Wahl ihres Winkels verursacht werden, sollten nun seltener auftreten, obwohl es immer noch eine große Anzahl von Szenarien gibt, in denen die Lösung suboptimal ist.
  • Die Ausgabe der Befehlszeilenoption --query-printer-models wurde um die Bettform und -abmessungen erweitert. Beachten Sie, dass benutzerdefinierte Bettformen derzeit nicht unterstützt werden.
  • Die Benachrichtigung „Neue Version verfügbar“ kann jetzt verwendet werden, um den Benutzer auf unsere Webseite zu leiten, anstatt nur die ausführbare Datei herunterzuladen. Ab sofort veröffentlichen wir zwei verschiedene Linux-AppImages, sodass der Benutzer auswählen kann, welches er herunterladen möchte.
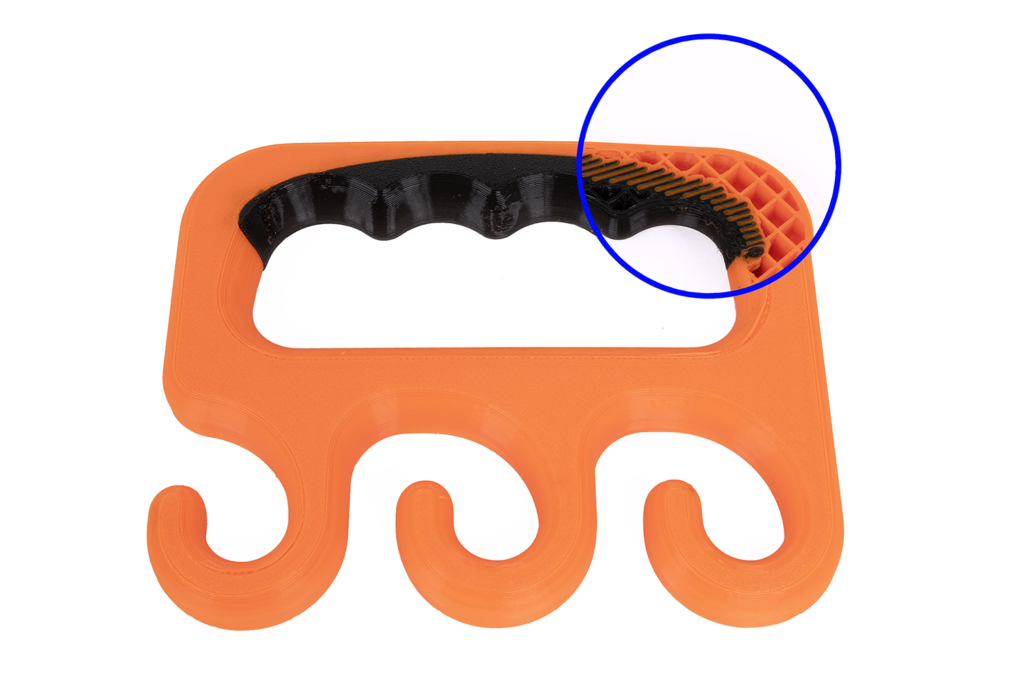
  • Es wurde eine neue Infill-Art namens „Zickzack“ erstellt. Es verhält sich genauso wie das geradlinige Muster, außer dass das Muster zwischen den Schichten ausgerichtet ist (das geradlinige Muster ist für kurze Wege optimiert, was zu Unregelmäßigkeiten führt). Das Drucken des neuen Infills kann daher etwas länger dauern, obwohl der Effekt bei den meisten Drucken vernachlässigbar ist. Es ist möglich, dass das geradlinige und das Zickzack-Muster in einer der kommenden Versionen zu einem einzigen Infill-Typ zusammengeführt werden.

WICHTIGER HINWEIS FÜR LINUX-BENUTZER!

PrusaSlicer ist jetzt von der WebKit-Bibliothek abhängig, was die Verbreitung erheblich erschwert. Die neuesten Linux-Distributionen (wie Ubuntu 24.04, Fedora 40) werden mit einer neueren Version von WebKit ausgeliefert als ältere (aber immer noch unterstützte) Distributionen. Die Bündelung von WebKit in das AppImage ist schwierig und möglicherweise nicht möglich.

Daher stellen wir jetzt zwei separate AppImages zur Verfügung, die beide von der Webkit-Bibliothek abhängen. Sie müssen möglicherweise das entsprechende Paket installieren, bevor Sie PrusaSlicer ausführen können.

Buildmin libwebkit2gtk VersionDistributuionsbeispiele
ältere Distributionen4.0Ubuntu 22.04, Fedora 39, Debian 11
moderne Distributionen4.1Ubuntu 24.04, Fedora 40, Debian 12

Die AppImages können sich selbst extrahieren, wenn sie mit dem Befehlszeilenparameter --appimage-extract ausgeführt werden.

Es ist sehr wahrscheinlich, dass PrusaSlicer erst ab der nächsten Version auf die Flatpak-Bereitstellung umstellt. Das AppImage war sinnvoll, als es noch im „Bundle What You Can“ verwendet werden konnte, aber mehrere verschiedene AppImages verteilen und die erforderliche Build-Infrastruktur warten zu müssen (und sich immer noch Gedanken darüber zu machen, was aktualisiert werden muss, wenn ein Update für eine Linux-Distribution veröffentlicht wird), bedeutet Zeitverlust, die wir viel lieber in die eigentliche Arbeit an PrusaSlicer investieren würden.

Version 2.8.0

27. 6. 2024

This release introduces several UI improvements, Prusa Account login and Prusa Connect integration, improved G-code viewer, better seams, single perimeter for top and bottom layers, and more many more improvements and bugfixes.

Improved UI

We have decided to do several tweaks to the user interface. It is by no means a complete redesign, so the controls are mostly where you are used to find them. The most visible change is the top bar. The system menu was removed (on Windows and Linux only) and it is now accessible through a separate button at the very left of the top bar. The settings tabs are now larger and styled. The larger top bar allowed us to integrate the Search field into it, so it is readily accessible and it looks the same regardless of which tab is active (unlike in previous versions). The right part of the top bar features the Simple/Advanced/Expert switch (which is newly a dropdown) and the PrusaAccount login box.

Next, both sliders in the Preview have been completely reworked and are now part of the 3D scene, instead of being placed in a neighboring panels. Apart from looking nicer and more modern, removing the side panels means that the canvas size is larger. It also comes with a nice benefit that switching back and forth between the 3D view and Preview no longer shifts the view, the views are now perfetly aligned.

image


Credits go to BambuStudio, whose sliders were used a starting point for the implementation (although we later ended up rewriting most of it to fit current PrusaSlicer architecture).

Topping the list of the UI improvements, the spacing and icon size in the toolbars in the scene was slightly changed. The toolbars are now nicer and look less cramped.

Prusa Connect integration

Prusa Connect is our online system to control printers from the browser and distribute print jobs among them. Starting with this release, Prusa Connect is accessible directly from PrusaSlicer to streamline the workflow. A login box was added to the right of the top bar. When the login is successful, one more tab (Prusa Connect) will appear in the top bar. This tab will present your Prusa Connect dashboard and all features that you are used to.

When logged in, PrusaSlicer keeps track of the status of your printers and it also knows with which of your printer profiles they are compatible (printer model, MMU capabilities and nozzle diameter are checked). When a printer compatible with a given printer profile is in Prusa Connect, a little colored dots will appear in the printer profile dropdown in the right panel, displaying current status of that printer. The summary of the state of connected printers is shown just below the dropdown.

When a G-code is ready to be exported, a ‘Send to Connect’ button appears in the right panel. Clicking this button will open a dialog window presenting all your Connect printers compatible with the current project and allowing you to send the generated G-code to one of them.

To streamline the workflow in the other direction, there is an extra button in Connect labeled “Set as current”, which is shown for every printer. Clicking it will switch back to Plater tab and select first compatible printer profile automatically. The language settings and light/dark mode in the Prusa Connect tab is automatically switched so they match what is currently selected in PrusaSlicer.

Previous way of sending G-codes to Prusa Connect using a physical printer profile is deprecated. Users should stop using physical printers for Prusa Connect, although the support will be maintained for some time. Nothing changes with regard to PrusaLink or the other print hosts.

Note that logging in or using Prusa Connect is completely optional. PrusaSlicer will work fine without the login, as it has worked before. We are considering to add a Preferences checkbox to hide the login box completely to not bother people who intend to never use it anyway.

Improved G-code Viewer

The integrated G-code Viewer has been significantly reworked to improve its performance. Less data are now transmitted between the CPU and GPU and more of the work is now performed on the GPU side.

Furthermore, G-code Viewer is now able to visualize actual speed. The printer accelerates and decelerates when direction changes, so even though the required speed is set to a given value, it takes some time to reach it (if it is reached at all). The acceleration limits are (as they always were) configurable in Printer Settings -> Machine limits and PrusaSlicer always calculated with the acceleration and deceleration phases to get precise time estimate, but it did not allow to visualize them.

image

Note that the same disclaimers as for precise time estimates hold. If the machine limits are set incorrectly (in the sense that the printer uses different values), both the time estimate and the real speed visualization will not align with reality. Also, the actual speed visualization is not available for firmware flavors for which slicer does not allow setting the machine limits.

In addition, when moving the horizontal slider, there is a new popup dialog showing the data that G-code Viewer has about current segment, including the actual speed profile:

Single Perimeter for top and bottom layers

We have ported an option to use single perimeter for (top) solid infill layer. The feature can be configured in Print Settings -> Only one perimeter and based on the configuration, it results in single perimeter on all solid infill layers, on top solid infill layers or on topmost solid infill layers. This generally leads to improved visual look of the printed object, without sacrificing structural rigidity.

This is a frequently requested feature, which was first implemented in SuperSlicer, ported over to OrcaSlicer and then reimplemented in BambuStudio. We have ported the code from BambuStudio with only small changes. Even though we ended up not using the original SuperSlicer implementation, we would like to thank to everyone who implemented the feature there and who worked on a PR with the port (#10648), namely @supermerill, @vovodroid, @mjonuschar. Thanks also go to @bambulab for rewriting the feature later.

New system profile updating system

Since Slic3rPE 1.40 (released six years ago), PrusaSlicer has a built-in profile updater. Its task is to deliver read-only “system” profiles, which are fine tuned for the given printer and filament, sparing the user from having to tweak the individual parameters. The database of profiles has been growing ever since, and it contains many profiles, both for Prusa products and products from other vendors.

We have now split the profile database into several profile “repositories”. Profiles are updated only from repositories that PrusaSlicer is subscribed to. The repositories are selected at the beginning of the Configuration Wizard. The transition of your previous configuration requires no action on the user’s side, the repositories are automatically selected based on your currently installed profiles.

This brings the following benefits:

  • Configuration Wizard loads faster, because it generally processes less data.
  • Notifications informing about an existing update are only shown for your active repositories. E.g. if you only use SL1 printer, you are not disturbed by notifications about updated filament profiles, which are not relevant to you.

Offline updates

We have also covered the problem of updating system profiles on computers without internet connection. Not connecting a computer to the internet is an obvious security measure in environments where data leaks would pose a problem. However, the profile updater in PrusaSlicer relied on internet connection and there was no way of updating the profiles on such off-the-grid stations. They had to rely on undocumented and very user-unfriendly copying of configuration folders, transferring settings as config bundles, etc.

It is now possible to download a file containing the configuration update for a given repository from our website (note that the URL and the website are also in an alpha stage). This file can then be loaded as an “Offline repository”, and the configuration process treats is the same way as it would use an online update. This gives the user a possibility to update profiles by transferring this file to the off-the-grid computer on a removable drive, distribute it using a local network storage, etc.
These files can be loaded (and removed) also in the Configuration Wizard. PrusaSlicer remembers path to the loaded files and it tries to use them anytime when configuration update is triggered.

Seam improvements

Placement of seams is not a very well defined task, and it has many solutions. After the last big batch of changes in the seam placing algorithm (in 2.5.0-alpha2), the placing of seams was detrimental on various models.

In this release, the seam-placing algorithm was significantly changed to improve the results. We also did some other changes which allow the seam placing algorithm to do a better job. To name the most visible improvements:

  • The ordering of perimeters was optimized to avoid unnecessary long travels between individual loops.
  • To further reduce long travels, in some special cases where there are two external perimeters the seams are placed in roughly the same spot.
  • The previous algorithm for aligned seams produced the seams from discontinuous “seam chains” picked heuristically on the object’s surface. Consequently, the old algorithm needed to fit a curve through the resulting seam points to achieve an aesthetically pleasing result. This worked for some models but produced worse results on others, where a strange “wiggling” appeared in places where a straight line was expected. This was particularly noticeable on very simple cylindrical models. The new seam aligning algorithm avoids this issue by employing a simpler strategy, more similar to the one used before 2.5.0-alpha2. It plans the seam from the bottom up, snapping to sharp corners. This approach generates several possible seams and selects the best one based on visibility criteria.
  • One of the improvements in 2.5.0-alpha2 was the use of a seam visibility metric for seam placement. This worked well for seam hiding and the new algorithm still uses the visibility metric as the main criterion to pick the best seam possible.
  • Previously, a single algorithm with different optimization criteria was used for both the aligned seam and the rear seam. This meant that the rear seam placement suffered from the same issues as the aligned seam algorithm (notably the artifacts produced by curve fitting). Another reported issue with the rear seam algorithm was that it had no notion of object center. In many use cases it is desirable that the seam is not only in the rear part of the object but also centered. Now there is a completely new separate algorithm for rear seam placement that tries to satisfy both criteria (rear and center).
  • The nearest seam algorithm is now fully separated. It now simply first searches for the nearest corner to the previous position. If there is none it picks the nearest point on the perimeter.

Version 2.7.4

5. 4. 2024

Dies ist eine kleine Patch-Version:

  • Objekte aus 3MFs, die von BambuStudio generiert wurden, behalten nun die Multimaterialbemalung bei, wenn sie geladen werden.
  • Beseitigung eines Fehlers, bei dem das Herunterladen von Dateien aus Printables nicht funktionierte, wenn es in den Einstellungen aktiviert war

Version 2.7.3

28. 3. 2024

Dies ist die stabile Version, die kleinere Verbesserungen und verschiedene Bugfixes enthält.

Verbesserungen beim Drucken von mehreren Materialien

Wir haben Änderungen an den Einstellungen für das Druckvolumen und neue Filament-Spitzenroutinen implementiert, die von der MMU3 auf dem MK4 verwendet werden.

Vasenmodus Glättung

Bei der Verwendung des Spiralvasenmodus werden die Werkzeugpfade wie üblich generiert und die daraus resultierenden Profile dann extrudiert, während z allmählich erhöht wird. Dieser Ansatz führte zu nahtähnlichen Artefakten auf dem Druck an Stellen, an denen sich normalerweise die Schichtübergänge befinden würden. Außerdem würde die letzte Schicht abrupt enden, so dass eine scharfe “Kante” entsteht, an der das Profil endet.

Beide Probleme wurden von @andrewboktor angegangen, indem zwischen benachbarten Schichten interpoliert und der Extrusionsfluss ganz am Ende des Drucks allmählich reduziert wurde. Die Verbesserung wurde vor kurzem in OrcaSlicer integriert, und wir erhielten einen Pull Request mit einer Portierung auf PrusaSlicer. Nachdem wir die Funktion bewertet haben, haben wir beschlossen, sie einzubinden, da sie gut geschrieben ist, gut funktioniert und sehr nützlich ist.

Vielen Dank an @andrewboktor für die Zeit und Mühe, die er in das Problem investiert hat, und an @vovodroid und @tg73 für die Bereitstellung eines Pull Requests mit einer Portierung von OrcaSlicer.

Unterstützung für in BambuStudio erzeugte 3MF-Dateien

PrusaSlicer ist jetzt in der Lage, 3MF-Dateien zu öffnen, die von BambuStudio erzeugt wurden, und Geometrie daraus zu laden. (#10718, PR #10808, Dank an @cmguo). Bitte beachten Sie, dass BambuStudio es erlaubt, eine 3MF zu speichern, die nur G-Code enthält. Dies wird von PrusaSlicer nicht unterstützt und das Laden solcher 3MFs wird fehlschlagen.

Metadaten mit Begrenzungspolygon für jedes Objekt

Metadaten von binären G-Codes haben einen neuen Eintrag namens objects_info, der alle Objekte im Druck und ihre Begrenzungspolygone auflistet. Die gleichen Informationen wurden in die Kommentare am Ende von ASCII-G-Codes eingefügt. Dies ist nützlich, um die Funktion Objekt abbrechen über Prusa Connect fernzusteuern.

Version 2.7.2

29. 2. 2024

Dies ist die stabile Version, die kleinere Verbesserungen und verschiedene Fehlerbehebungen enthält.

Verbesserte Multi-Material-Bemalung

Wir haben mehrere Mechanismen implementiert, um ein ungültiges Voronoi-Diagramm zu erkennen. Durch Manipulation der Eingabe konnten wir sicherstellen, dass das Voronoi-Diagramm gültig ist. Außerdem haben wir einen wesentlichen Teil der Multi-Material-Malerei von Grund auf neu implementiert, was zusammen mit den oben genannten Änderungen alle Probleme mit verschütteten Schichten bei der Multi-Material-Segmentierung lösen sollte.

Farbwechsel (M600) Community-getriebene Verbesserung

Früher platzierte PrusaSlicer den Farbwechsel (M600) direkt nach der Fertigstellung der vorherigen Schicht. Die Standardimplementierung des Farbwechsels in so gut wie allen Firmwares setzt die Düse genau an die gleiche Position zurück wie vor dem Farbwechsel. Als Folge dieses Verhaltens würde ein kleiner Klecks Filament mit der neu geladenen Farbe am Druck hängen bleiben.

Unsere Community, insbesondere @Nohus, fand eine Lösung, den Farbwechsel nach dem Wechsel zur nächsten Schicht und Position zu platzieren, was sich als wesentlich einfachere und universellere Lösung erwies als die Änderung der M600-Implementierung auf der Firmware-Seite. Vielen Dank, Nohus, für Ihre Umsetzung und an alle, die sich am Testen seiner Änderung beteiligt haben.

Ramping Verfahrbewegungen: Reibungsloser und effizienter

Wir haben die in 2.7.1 eingeführten Änderungen an den spiralförmigen Schichtwechseln durch ein verfeinertes Rampenprofil ersetzt. Die spiralförmigen Schichtwechsel halfen zwar, das Stringing zu reduzieren, verursachten aber manchmal Farbkleckse und Artefakte. Mit dem neuen und verfeinerten Rampenprofil wird das Stringing immer noch gemildert, ohne die Nachteile der schraubenförmigen Bewegungen.

SLA Überschreibungen

Für den SLA-Druck haben wir Material Overrides eingeführt. Diese neue Funktion, die die Flexibilität des FDM-Slicens widerspiegelt, ermöglicht es, ausgewählte Konfigurationsoptionen aus den Druck- oder Druckereinstellungen in den Materialeinstellungen außer Kraft zu setzen. Es gibt eine neue Parameterseite in den Materialeinstellungen, die es ermöglicht, die Parameter, die überschrieben werden sollen, zu überprüfen und ihren Wert neu zu definieren.

Abschied von Perl

PrusaSlicer hat seinen Ursprung in dem Projekt Slic3r, das ursprünglich in der Skriptsprache Perl geschrieben wurde. Im Laufe der Jahre haben wir fast den gesamten Code umgeschrieben. Zuerst den Kern zum Slicen, dann die Benutzeroberfläche. Jetzt haben wir alle verbleibenden Unit-Tests, die noch auf Perl basieren, in C++ umgeschrieben. Auf Wiedersehen, Perl. Wir werden dich nicht vermissen.