Version 2.9.4
7. 11. 2025- Junction Deviation Integration
- Improved Time Estimation

The PrusaSlicer team is proud to be the first to introduce Smart Sequential Printing Arrange, an advanced solver-based approach that pushes the limits of 3D printing. Our unique algorithm intelligently arranges objects to prevent collisions, making sequential printing more efficient and reliable than ever. This feature enables your printer to complete individual objects one after another rather than printing everything at once from the bottom layer up.
Sequential printing drastically reduces nozzle travel and is especially useful when you need to eliminate stringing and oozing between individual objects. It also helps maintain consistent layer adhesion, reducing issues like delamination (layer separation) or poor bonding between layers. Moreover, it could also prevent losing multiple half-finished prints if one of the objects detaches from the print bed. Finally, you can sequentially print multiple objects in vase mode, which is impossible with normal printing!
Additionally, a 3D extruder model is rendered while browsing through the Preview with the horizontal slider (as seen above). This little “time-lapse” speaks volumes—for successful sequential printing, no part of the extruder (or axis rods and cables) can bump into any of the objects already on the plate. The calculation requires detailed information about the extruder geometry, which is why the feature is now only available for Prusa printers (except the MK2). We might add support for third-party printers later.
To try out sequential printing, just enable Complete individual objects (in Print Settings → Output options) and then use the Arrange tool (or press “A”) in the Plater view. Then, you can press “E” to display the printing sequence.
We implemented this feature in cooperation with Professor Pavel Surynek from the Czech Technical University in Prague, who created the advanced printing algorithm, which will even be published in a scientific paper. This is one of the excellent outcomes of our long-term collaboration with academia. After all, we are Prusa Research!
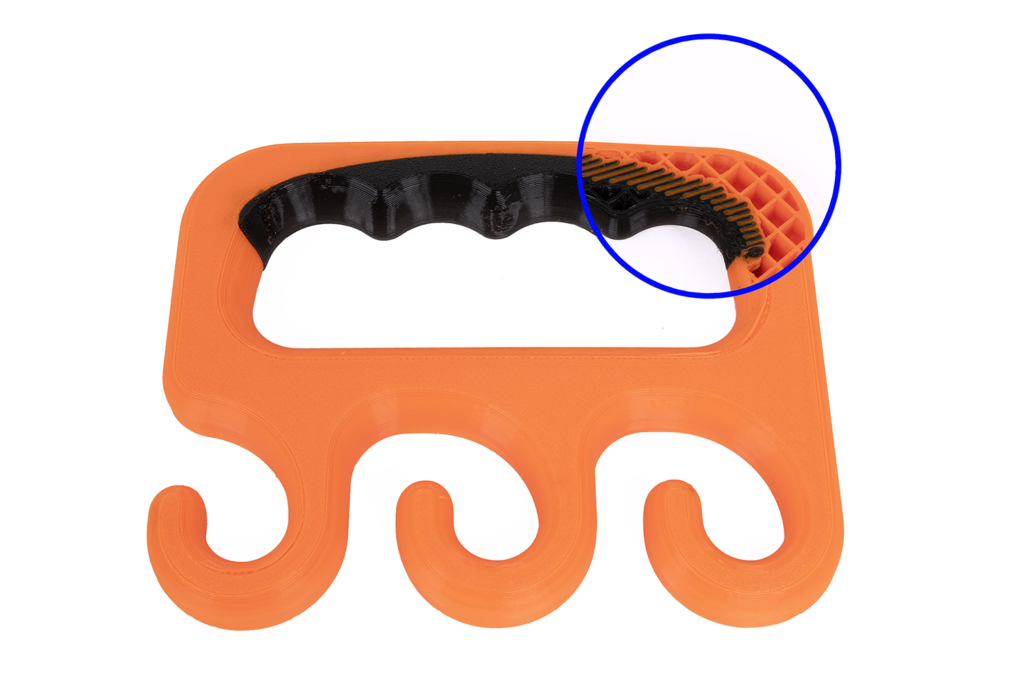
PrusaSlicer can now interlock neighboring parts made from different materials, creating a cross-hatching boundary between them. This creates a bond for filaments that don’t usually stick together, such as PLA, PETG, and FLEX, greatly simplifying the process of printing on multi-extruder printers like Prusa XL. Before this interlocking feature, you would need cleverly designed models with anchors to lock the materials together physically.

A shopping bag carrier with a partially flexible handle for a more comfortable grip. The cross-hatching texture between the materials is hidden inside the print, while the outside remains nice and clean.
Interlocking works both for specifically designed models with separate meshes and for materials assigned with painting tools and modifiers within PrusaSlicer. This simplifies the design process and can quickly turn a regular model into a multi-material one.
A cable passthrough grommet with a flexible cable tunnel and rigid outer structure.
To try this feature, enable “Use beam interlocking” in the Multiple Extruders settings. The slicer will handle the rest. Of course, you can fine-tune the result with various settings.
The feature was initially developed in Ultimaker Cura and subsequently ported to OrcaSlicer. With only minor modifications, it was derived and implemented in PrusaSlicer. We are grateful to everyone involved in developing this feature!
We are introducing a completely new SLA support spot generator that replaces the current solution and provides more accurate and predictable support placement. The new algorithm better identifies the areas that need support and adjusts the support strategy accordingly. It is also non-randomized, consistently producing the same results when given the same input. Overall, this represents a significant improvement over the previous algorithm, which often failed spectacularly, even in very simple cases.
Additional changes make it easier to manage supports and enhance visual feedback:
Simplified printing with different materials
PrusaSlicer will now prompt you to use a new setting called Bed temperature by extruder when printing with multiple materials. This setting helps you choose the appropriate temperature that would work best for all materials.
We also released an updated configuration profile for Prusa XL that includes the Breakaway presets. These are specifically designed for printing the main object and supports with different filaments, such as PLA and PETG. As mentioned above, these materials don’t stick together well, which is ideal for creating easily removable supports.
We added new parameters handy for fine-tuning, which can be found in the Speed section of Print Settings. You can now separately set the First layer solid infill speed, and also the speed of infill over bridges – useful if you want to slow down only on these tricky areas specifically.
In the SLA Material printing profiles, you can now click one of the new buttons to quickly set all tilt-related fields to predefined values corresponding to the legacy profiles: Fast, Slow, and High Viscosity.
As always, there are many more improvements and bug fixes that couldn’t fit into our blog post. Please see the Github release page for detailed information about all the changes!
Happy slicing!

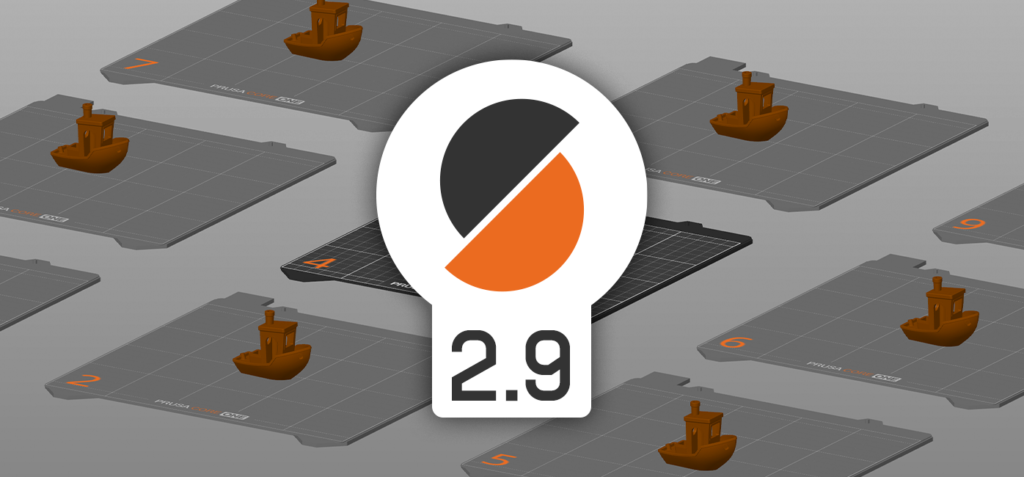
You can now use up to 9 beds in a single scene. This allows you to handle more complicated projects (which do not fit a single bed) more easily than before. All the beds share the same print settings, so you would typically use this feature to organize multi-part prints. The Arrange tool now spreads objects across multiple beds if they would not fit on a single one. A separate button that arranges objects only within the active bed was also added.
Beds are also automatically added and removed based on your interaction. Simply move objects to the space where another bed would be, and it will spawn. The beds are always arranged in the same 3 x 3 grid, making them easy to keep track of.
You can slice the beds individually or all at once. If you choose the latter option, you can then bulk export the G-codes or add them all to the print queue via Prusa Connect. The export screen even provides useful statistics about the overall print time and filament use.
PrusaSlicer had a minimal concept of virtual beds for many years, which is obvious from the Arrange function. When there were too many objects to place on a single bed, PrusaSlicer would keep adding them spaced as if there were other beds next to each other. If you load such a project into PrusaSlicer 2.9.0, this situation is detected and the objects on these virtual “beds” are moved so they actually end up on a non-virtual bed in the grid. It’s also worth mentioning that several PrusaSlicer forks (OrcaSlicer/BambuStudio) have already expanded on the original functionality and while the implementation in PrusaSlicer is completely independent, it was useful to see how they approach the problem.
We’ve added a new seam option dubbed “scarf seams” by the community. Its primary purpose is to hide visible seams on smooth perimeters, which is achieved by overlapping extrusions at the start and end of a perimeter loop. The name of the feature originates from a similar technique in woodworking called the “scarf joint.”
In the example above, a cylinder is printed with both a regular seam and a scarf seam. Number one marks the scarf seam start, number two is its end, and number three is a standard seam. The scarf seam greatly reduces the visibility of the usual seam. Yet, it is not a silver bullet, as it may generate a new “ghost” seam, albeit much less visible than the original seam.
Thanks to @MichaelJLew and @vgdh for coming up with this idea, and @Noisyfox for its implementation into OrcaSlicer. Our implementation is original but mimics the functionality of the OrcaSlicer feature.
Printables is now a persistent tab in Prusaslicer’s top bar. It is available to all users, even without logging in. The tab is implemented as a webpage within a WebView, allowing users to access the familiar features and functionalities of the Printables website.
Similarly to the web version, you can browse 3D models within the Printables tab and seamlessly open them on the Plater tab using the Slice button featuring the Printables logo, or send G-codes directly to your printer via Prusa Connect.
The new fuzzy skin painting tool, available from the left toolbar, allows you to easily add fuzzy skin to parts of objects without using modifiers. It features a few brush types and a smart fill tool similar to the multi-material tool and the support painting tool.
This new tool complements the overall improvement of fuzzy skin generation. Previously, it split an object into separate regions with their own perimeters. The new implementation works as you would intuitively expect, only affecting the outside perimeter. The texture quality of the fuzzy skin has also been improved.
The height range tool was added to the multi-material painting, allowing you to create perfect horizontal stripes of color across the whole object.
The bucket tool has also been improved and now includes a fill angle setting, similar to the smart fill tool. This works great with the height range tool, which you can use to mark the borders for coloring.
The processing of painted models has been improved, and various types of artifacts have been fixed. This means the sliced models will now better match how they were painted.
Experimental support for printing with different nozzle diameters on multi-tool printers, such as the Original Prusa XL, is now available for experienced users and developers. This workflow allows combining nozzles of different diameters (e.g., a smaller one for fine perimeters and a larger one for fast infill). Check out our Knowledge base for a step-by-step tutorial.
Check out the PrusaSlicer release page for further details about the above-mentioned features and the complete list of all changes and bug fixes.
We truly appreciate all the wonderful contributions from our community members who help make PrusaSlicer and its forks even better!